Part 1: Minting tokens
To start working with the application, you create a Taqueria project and use it to deploy an FA2 contract. Then you set up a web application to mint NFTs by calling the contract's mint endpoint and uploading an image and metadata to IPFS.
Before you begin, make sure that you have installed the tools in the Prerequisites section.
Creating a Taqueria project
Taqueria manages the project structure and keeps it up to date. For example, when you deploy a new smart contract, Taqueria automatically updates the web app to send transactions to that new smart contract. Follow these steps to set up a Taqueria project:
-
On the command-line terminal, run these commands to set up a Taqueria project and install the LIGO and Taquito plugins:
taq init nft-marketplace
cd nft-marketplace
taq install @taqueria/plugin-ligo
taq install @taqueria/plugin-taquito -
Install the
ligo/falibrary, which provides templates for creating FA2 tokens:echo '{ "name": "app", "dependencies": { "@ligo/fa": "^1.0.9" } }' >> ligo.json
TAQ_LIGO_IMAGE=ligolang/ligo:1.1.0 taq ligo --command "install @ligo/fa"
This command can take some time because it downloads and installs the @ligo/fa package.
Creating an FA2 contract from a template
The ligo/fa library provides a template that saves you from having to implement all of the FA2 standard yourself.
Follow these steps to create a contract that is based on the template and implements the required endpoints:
-
Create a contract to manage your NFTs:
taq create contract nft.jsligo -
Open the
contracts/nft.jsligofile in any text editor and replace the default code with this code:#import "@ligo/fa/lib/fa2/nft/nft.impl.jsligo" "FA2Impl"
/* ERROR MAP FOR UI DISPLAY or TESTS
const errorMap : map<string,string> = Map.literal(list([
["0", "Enter a positive and not null amount"],
["1", "Operation not allowed, you need to be administrator"],
["2", "You cannot sell more than your current balance"],
["3", "Cannot find the offer you entered for buying"],
["4", "You entered a quantity to buy than is more than the offer quantity"],
["5", "Not enough funds, you need to pay at least quantity * offer price to get the tokens"],
["6", "Cannot find the contract relative to implicit address"],
]));
*/
export type storage = {
administrators: set<address>,
ledger: FA2Impl.NFT.ledger,
metadata: FA2Impl.TZIP16.metadata,
token_metadata: FA2Impl.TZIP12.tokenMetadata,
operators: FA2Impl.NFT.operators
};
type ret = [list<operation>, storage];The first line of this code imports the FA2 template as the
FA2Implobject. Then, the code defines error messages for the contract.The code defines a type for the contract storage, which contains these values:
administrators: A list of accounts that are authorized to mint NFTsledger: The ledger that keeps track of token ownershipmetadata: The metadata for the contract itself, based on the TZIP-16 standard for contract metadatatoken_metadata: The metadata for the tokens, based on the TZIP-12 standard for token metadataoperators: Information about operators, accounts that are authorized to transfer tokens on behalf of the owners
The code also defines the type for the value that entrypoints return: a list of operations and the new value of the storage.
-
Add code to implement the required
transfer,balance_of, andupdate_operatorsentrypoints:@entry
const transfer = (p: FA2Impl.TZIP12.transfer, s: storage): ret => {
const ret2: [list<operation>, FA2Impl.NFT.storage] =
FA2Impl.NFT.transfer(
p,
{
ledger: s.ledger,
metadata: s.metadata,
token_metadata: s.token_metadata,
operators: s.operators,
}
);
return [
ret2[0],
{
...s,
ledger: ret2[1].ledger,
metadata: ret2[1].metadata,
token_metadata: ret2[1].token_metadata,
operators: ret2[1].operators,
}
]
};
@entry
const balance_of = (p: FA2Impl.TZIP12.balance_of, s: storage): ret => {
const ret2: [list<operation>, FA2Impl.NFT.storage] =
FA2Impl.NFT.balance_of(
p,
{
ledger: s.ledger,
metadata: s.metadata,
token_metadata: s.token_metadata,
operators: s.operators,
}
);
return [
ret2[0],
{
...s,
ledger: ret2[1].ledger,
metadata: ret2[1].metadata,
token_metadata: ret2[1].token_metadata,
operators: ret2[1].operators,
}
]
};
@entry
const update_operators = (p: FA2Impl.TZIP12.update_operators, s: storage): ret => {
const ret2: [list<operation>, FA2Impl.NFT.storage] =
FA2Impl.NFT.update_operators(
p,
{
ledger: s.ledger,
metadata: s.metadata,
token_metadata: s.token_metadata,
operators: s.operators,
}
);
return [
ret2[0],
{
...s,
ledger: ret2[1].ledger,
metadata: ret2[1].metadata,
token_metadata: ret2[1].token_metadata,
operators: ret2[1].operators,
}
]
};You will add other entrypoints later, but these are the three entrypoints that every FA2 contract must have. Because these required entrypoints must have specific parameters, the code re-uses types from the
FA2Implobject for those parameters. For example, theFA2Impl.TZIP12.transfertype represents the parameters for transferring tokens, including a source account and a list of target accounts, token types, and amounts.-
The
transferentrypoint accepts information about the tokens to transfer. This implementation uses theFA2Impl.NFT.transferfunction from the template to avoid having to re-implement what happens when tokens are transferred. -
The
balance_ofentrypoint sends information about an owner's token balance to another contract. This implementation re-uses theFA2Impl.NFT.balance_offunction. -
The
update_operatorsentrypoint updates the operators for a specified account. This implementation re-uses theFA2Impl.NFT.update_operatorsfunction.
-
-
After those entrypoints, add code for the
mintentrypoint:@entry
const mint = (
[token_id, name, description, symbol, ipfsUrl]: [
nat,
bytes,
bytes,
bytes,
bytes
],
s: storage
): ret => {
if (! Set.mem(Tezos.get_sender(), s.administrators)) return failwith("1");
const token_info: map<string, bytes> =
Map.literal(
list(
[
["name", name],
["description", description],
["interfaces", (bytes `["TZIP-12"]`)],
["artifactUri", ipfsUrl],
["displayUri", ipfsUrl],
["thumbnailUri", ipfsUrl],
["symbol", symbol],
["decimals", (bytes `0`)]
]
)
) as map<string, bytes>;
return [
list([]) as list<operation>,
{
...s,
ledger: Big_map.add(token_id, Tezos.get_sender(), s.ledger) as
FA2Impl.NFT.ledger,
token_metadata: Big_map.add(
token_id,
{ token_id: token_id, token_info: token_info },
s.token_metadata
),
operators: Big_map.empty as FA2Impl.NFT.operators,
}
]
};The FA2 standard does not require a mint entrypoint, but you can add one if you want to allow the contract to create more tokens after it is originated. If you don't include a mint entrypoint or a way to create tokens, you must initialize the storage with all of the token information when you originate the contract. This mint entrypoint accepts a name, description, symbol, and IPFS URL to an image. It also accepts an ID number for the token, which the front end will manage; you could also set up the contract to remember the ID number for the next token.
First, this code verifies that the transaction sender is one of the administrators. Then it creates a token metadata object with information from the parameters and adds it to the
token_metadatabig-map in the storage. Note that thedecimalsmetadata field is set to 0 because the token is an NFT and therefore doesn't need any decimal places in its quantity.Note that there is no built-in way to get the number of tokens in the contract code; the big-map does not have a function such as
keys()orlength(). If you want to keep track of the number of tokens, you must add an additional element in the storage and increment it when tokens are created or destroyed. You can also get the number of tokens by analyzing the contract's storage from an off-chain application. -
Run one of these commands to accept or decline LIGO's analytics policy:
ligo analytics acceptto send analytics data to LIGOligo analytics denyto not send analytics data to LIGO
-
Save the contract and compile it by running this command:
TAQ_LIGO_IMAGE=ligolang/ligo:1.1.0 taq compile nft.jsligoTaqueria compiles the contract to the file
artifacts/nft.tz. It also creates the filenft.storageList.jsligo, which contains the starting value of the contract storage. -
Open the file
contracts/nft.storageList.jsligoand replace it with this code:#import "nft.jsligo" "Contract"
const default_storage : Contract.storage = {
administrators: Set.literal(
list(["tz1VSUr8wwNhLAzempoch5d6hLRiTh8Cjcjb" as address])
) as set<address>,
ledger: Big_map.empty as Contract.FA2Impl.NFT.ledger,
metadata: Big_map.literal(
list(
[
["", bytes `tezos-storage:data`],
[
"data",
bytes
`{
"name":"FA2 NFT Marketplace",
"description":"Example of FA2 implementation",
"version":"0.0.1",
"license":{"name":"MIT"},
"authors":["Marigold<contact@marigold.dev>"],
"homepage":"https://marigold.dev",
"source":{
"tools":["Ligo"],
"location":"https://github.com/ligolang/contract-catalogue/tree/main/lib/fa2"},
"interfaces":["TZIP-012"],
"errors": [],
"views": []
}`
]
]
)
) as Contract.FA2Impl.TZIP16.metadata,
token_metadata: Big_map.empty as Contract.FA2Impl.TZIP12.tokenMetadata,
operators: Big_map.empty as Contract.FA2Impl.NFT.operators,
};This code sets the initial value of the storage. In this case, the storage includes metadata about the contract and empty big-maps for the ledger, token metadata, and operators. It sets the test account Alice as the administrator, which is the only account that can mint tokens.
-
Optional: Add your address as an administrator or replace Alice's address with your own. Note that only the addresses in the
administratorslist will be able to create tokens. -
Compile the contract:
TAQ_LIGO_IMAGE=ligolang/ligo:1.1.0 taq compile nft.jsligo -
Use one of these options to set up a Ghostnet account to use to deploy (originate) the contract:
-
To use your own account, open the
.taq/config.local.testing.jsonfile and add your public key, address, and private key, so the file looks like this:{
"networkName": "ghostnet",
"accounts": {
"taqOperatorAccount": {
"publicKey": "edpkvGfYw3LyB1UcCahKQk4rF2tvbMUk8GFiTuMjL75uGXrpvKXhjn",
"publicKeyHash": "tz1VSUr8wwNhLAzempoch5d6hLRiTh8Cjcjb",
"privateKey": "edsk3QoqBuvdamxouPhin7swCvkQNgq4jP5KZPbwWNnwdZpSpJiEbq"
}
}
}Then make sure that the account has tez on Ghostnet. Use the faucet at https://faucet.ghostnet.teztnets.com to get tez if you need it.
-
To let Taqueria generate an account for you, follow these steps:
-
Run the command
taq deploy nft.tz -e "testing", which will fail because you do not have an account configured in Taqueria. The response includes the address of an account that Taqueria generated for you and added to the.taq/config.local.testing.jsonfile automatically. -
Fund the account from the faucet at https://faucet.ghostnet.teztnets.com.
-
-
-
Compile and deploy the contract to Ghostnet by running this command:
taq deploy nft.tz -e "testing"Taqueria deploys the contract to Ghostnet and prints the address of the contract, as in this image:

Now the backend application is ready and you can start on the frontend application.
Creating the frontend application
To save time, this tutorial provides a starter React application.
-
In a folder outside of your Taqueria project, clone the source material by running this command:
git clone https://github.com/marigold-dev/training-nft-1.gitThis repository includes the starter application and the completed application that you can refer to later.
-
In your Taqueria project, create a folder named
appthat is at the same level as thecontractsfolder. -
From the repository, copy the contents of the
reactboilerplateappfolder to theappfolder.For information about how this starter application was created, see the "Dapp" section of this tutorial: https://github.com/marigold-dev/training-dapp-1#construction_worker-dapp.
-
From the root of your Taqueria project, run these commands to generate TypeScript types for the application:
taq install @taqueria/plugin-contract-types
taq generate types ./app/src -
If you are using a Mac, edit the default
devscript in theapp/package.jsonfile to look like this:{
"scripts": {
"dev": "if test -f .env; then sed -i '' \"s/\\(VITE_CONTRACT_ADDRESS *= *\\).*/\\1$(jq -r 'last(.tasks[]).output[0].address' ../.taq/testing-state.json)/\" .env ; else jq -r '\"VITE_CONTRACT_ADDRESS=\" + last(.tasks[]).output[0].address' ../.taq/testing-state.json > .env ; fi && vite"
}
}This is required on Mac computers because the
sedcommand behaves differently than on Unix computers. -
Run these commands to install the dependencies for the application and start it:
cd app
yarn install
yarn dev
This application contains basic navigation and the ability to connect to wallets. For a tutorial that includes connecting to wallets, see Build your first app on Tezos.
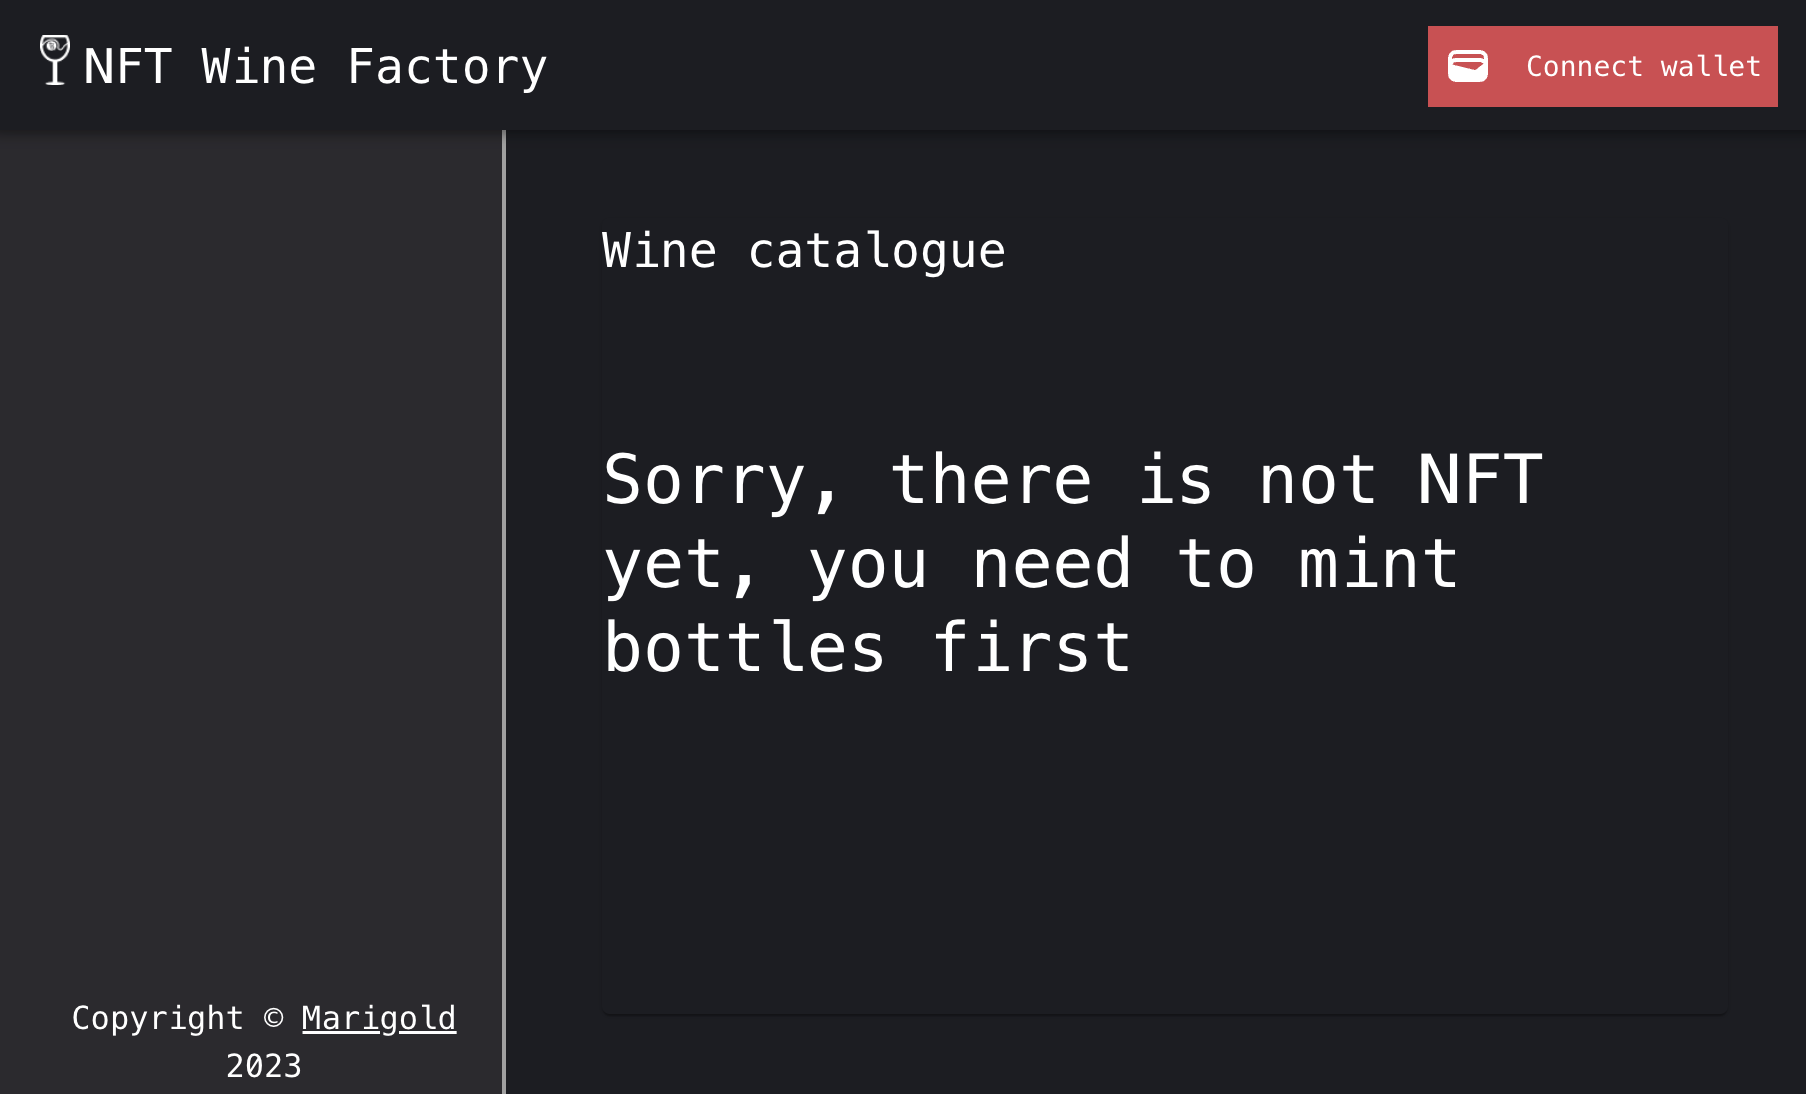
Because Taqueria automatically keeps track of your deployed contract, the application automatically accesses the contract and shows that there are no NFTs in it yet. The application looks like this:

Adding a mint page
The mint page uses a form that accepts information and an image and sends a transaction to the mint entrypoint:
-
Open the file
./app/src/MintPage.tsx. -
Replace the return value of the function (the
<Paper>tag) with the following code:<Paper>
{storage ? (
<Button
disabled={storage.administrators.indexOf(userAddress! as address) < 0}
sx={{
p: 1,
position: "absolute",
right: "0",
display: formOpen ? "none" : "block",
zIndex: 1,
}}
onClick={toggleDrawer(!formOpen)}
>
{" Mint Form " +
(storage!.administrators.indexOf(userAddress! as address) < 0
? " (You are not admin)"
: "")}
<OpenWithIcon />
</Button>
) : (
""
)}
<SwipeableDrawer
onClose={toggleDrawer(false)}
onOpen={toggleDrawer(true)}
anchor="right"
open={formOpen}
variant="temporary"
>
<Toolbar
sx={
isTablet
? { marginTop: "0", marginRight: "0" }
: { marginTop: "35px", marginRight: "125px" }
}
/>
<Box
sx={{
width: isTablet ? "40vw" : "60vw",
borderColor: "text.secondary",
borderStyle: "solid",
borderWidth: "1px",
height: "calc(100vh - 64px)",
}}
>
<Button
sx={{
position: "absolute",
right: "0",
display: !formOpen ? "none" : "block",
}}
onClick={toggleDrawer(!formOpen)}
>
<Close />
</Button>
<form onSubmit={formik.handleSubmit}>
<Stack spacing={2} margin={2} alignContent={"center"}>
<Typography variant="h5">Mint a new collection</Typography>
<TextField
id="standard-basic"
name="token_id"
label="token_id"
value={formik.values.token_id}
disabled
variant="filled"
/>
<TextField
id="standard-basic"
name="name"
label="name"
required
value={formik.values.name}
onChange={formik.handleChange}
error={formik.touched.name && Boolean(formik.errors.name)}
helperText={formik.touched.name && formik.errors.name}
variant="filled"
/>
<TextField
id="standard-basic"
name="symbol"
label="symbol"
required
value={formik.values.symbol}
onChange={formik.handleChange}
error={formik.touched.symbol && Boolean(formik.errors.symbol)}
helperText={formik.touched.symbol && formik.errors.symbol}
variant="filled"
/>
<TextField
id="standard-basic"
name="description"
label="description"
required
multiline
minRows={2}
value={formik.values.description}
onChange={formik.handleChange}
error={
formik.touched.description &&
Boolean(formik.errors.description)
}
helperText={
formik.touched.description && formik.errors.description
}
variant="filled"
/>
{pictureUrl ? (
<img height={100} width={100} src={pictureUrl} />
) : (
""
)}
<Button variant="contained" component="label" color="primary">
<AddCircleOutlined />
Upload an image
<input
type="file"
hidden
name="data"
onChange={(e: React.ChangeEvent<HTMLInputElement>) => {
const data = e.target.files ? e.target.files[0] : null;
if (data) {
setFile(data);
}
e.preventDefault();
}}
/>
</Button>
<Button variant="contained" type="submit">
Mint
</Button>
</Stack>
</form>
</Box>
</SwipeableDrawer>
<Typography variant="h5">Mint your wine collection</Typography>
{nftContratTokenMetadataMap.size != 0 ? (
"//TODO"
) : (
<Typography sx={{ py: "2em" }} variant="h4">
Sorry, there is not NFT yet, you need to mint bottles first
</Typography>
)}
</Paper>You may see errors in your IDE for missing code and imports that you will add later.
This code shows an HTML form if the connected wallet is an administrator. The form includes fields for a new NFT, including a button to upload an image.
-
Inside the
MintPagefunction, immediately before thereturnstatement, add this Formik form to manage the form:const validationSchema = yup.object({
name: yup.string().required('Name is required'),
description: yup.string().required('Description is required'),
symbol: yup.string().required('Symbol is required'),
});
const formik = useFormik({
initialValues: {
name: '',
description: '',
token_id: 0,
symbol: 'WINE',
} as TZIP21TokenMetadata,
validationSchema: validationSchema,
onSubmit: (values) => {
mint(values);
},
}); -
After this code, add state variables for the image and its URL:
const [pictureUrl, setPictureUrl] = useState<string>('');
const [file, setFile] = useState<File | null>(null); -
Add this code to manage a drawer that appears to show the form:
//open mint drawer if admin
const [formOpen, setFormOpen] = useState<boolean>(false);

useEffect(() => {
  if (storage && storage.administrators.indexOf(userAddress! as address) < 0)
    setFormOpen(false);
  else setFormOpen(true);
}, [userAddress]);

const toggleDrawer =
  (open: boolean) => (event: React.KeyboardEvent | React.MouseEvent) => {
    if (
      event.type === 'keydown' &&
      ((event as React.KeyboardEvent).key === 'Tab' ||
        (event as React.KeyboardEvent).key === 'Shift')
    ) {
      return;
    }
    setFormOpen(open);
}; -
Add this
mintfunction:const { enqueueSnackbar } = useSnackbar();
const mint = async (newTokenDefinition: TZIP21TokenMetadata) => {
try {
//IPFS
if (file) {
const formData = new FormData();
formData.append('file', file);
const requestHeaders: HeadersInit = new Headers();
requestHeaders.set(
'pinata_api_key',
`${import.meta.env.VITE_PINATA_API_KEY}`
);
requestHeaders.set(
'pinata_secret_api_key',
`${import.meta.env.VITE_PINATA_API_SECRET}`
);
const resFile = await fetch(
'https://api.pinata.cloud/pinning/pinFileToIPFS',
{
method: 'post',
body: formData,
headers: requestHeaders,
}
);
const responseJson = await resFile.json();
console.log('responseJson', responseJson);
const thumbnailUri = `ipfs://${responseJson.IpfsHash}`;
setPictureUrl(
`https://gateway.pinata.cloud/ipfs/${responseJson.IpfsHash}`
);
const op = await nftContrat!.methods
.mint(
new BigNumber(newTokenDefinition.token_id) as nat,
char2Bytes(newTokenDefinition.name!) as bytes,
char2Bytes(newTokenDefinition.description!) as bytes,
char2Bytes(newTokenDefinition.symbol!) as bytes,
char2Bytes(thumbnailUri) as bytes
)
.send();
//close directly the form
setFormOpen(false);
enqueueSnackbar(
'Wine collection is minting ... it will be ready on next block, wait for the confirmation message before minting another collection',
{ variant: 'info' }
);
await op.confirmation(2);
enqueueSnackbar('Wine collection minted', { variant: 'success' });
refreshUserContextOnPageReload(); //force all app to refresh the context
}
} catch (error) {
console.table(`Error: ${JSON.stringify(error, null, 2)}`);
let tibe: TransactionInvalidBeaconError =
new TransactionInvalidBeaconError(error);
enqueueSnackbar(tibe.data_message, {
variant: 'error',
autoHideDuration: 10000,
});
}
};This function accepts the data that the user puts in the form. It uploads the image to IPFS via Pinata and gets the IPFS hash, which identifies the published file and allows clients to request it later.
Then it calls the contract's
mintentrypoint and passes the NFT data as bytes, as the TZIP-12 standard requires for NFT metadata. -
Add code to set the ID for the next NFT based on the number of tokens currently in the contract:
useEffect(() => {
  (async () => {
    if (nftContratTokenMetadataMap && nftContratTokenMetadataMap.size > 0) {
      formik.setFieldValue('token_id', nftContratTokenMetadataMap.size);
    }
  })();
}, [nftContratTokenMetadataMap?.size]); -
Replace the imports at the top of the file with these imports:
import { AddCircleOutlined, Close } from '@mui/icons-material';
import OpenWithIcon from '@mui/icons-material/OpenWith';
import {
  Box,
  Button,
  Stack,
  SwipeableDrawer,
  TextField,
  Toolbar,
  useMediaQuery,
} from '@mui/material';
import Paper from '@mui/material/Paper';
import Typography from '@mui/material/Typography';
import { useFormik } from 'formik';
import React, { useEffect, useState } from 'react';
import * as yup from 'yup';
import { TZIP21TokenMetadata, UserContext, UserContextType } from './App';
import { useSnackbar } from 'notistack';
import { BigNumber } from 'bignumber.js';
import { address, bytes, nat } from './type-aliases';
import { char2Bytes } from '@taquito/utils';
import { TransactionInvalidBeaconError } from './TransactionInvalidBeaconError'; -
Save the file.
For the complete content of the mint page, see the completed part 1 app at https://github.com/marigold-dev/training-nft-1.
-
In the file
app/.env, replace the defaultVITE_PINATA_API_KEYandVITE_PINATA_API_SECRETvalues with your Pinata API key and API secret. If you don't have a Pinata API key, see the Configure IPFS storage section of the tutorial Create a contract and web app that mints NFTs.
Now the form has a working mint page. In the next section, you use it to mint NFTs.
Minting NFTs
Mint at least one NFT so you can see it in the site and contract:
-
Open the site by going to http://localhost:5173 in your web browser. If the site isn't running, go to the
appfolder and runyarn dev. -
Connect the administrator's wallet to the application.
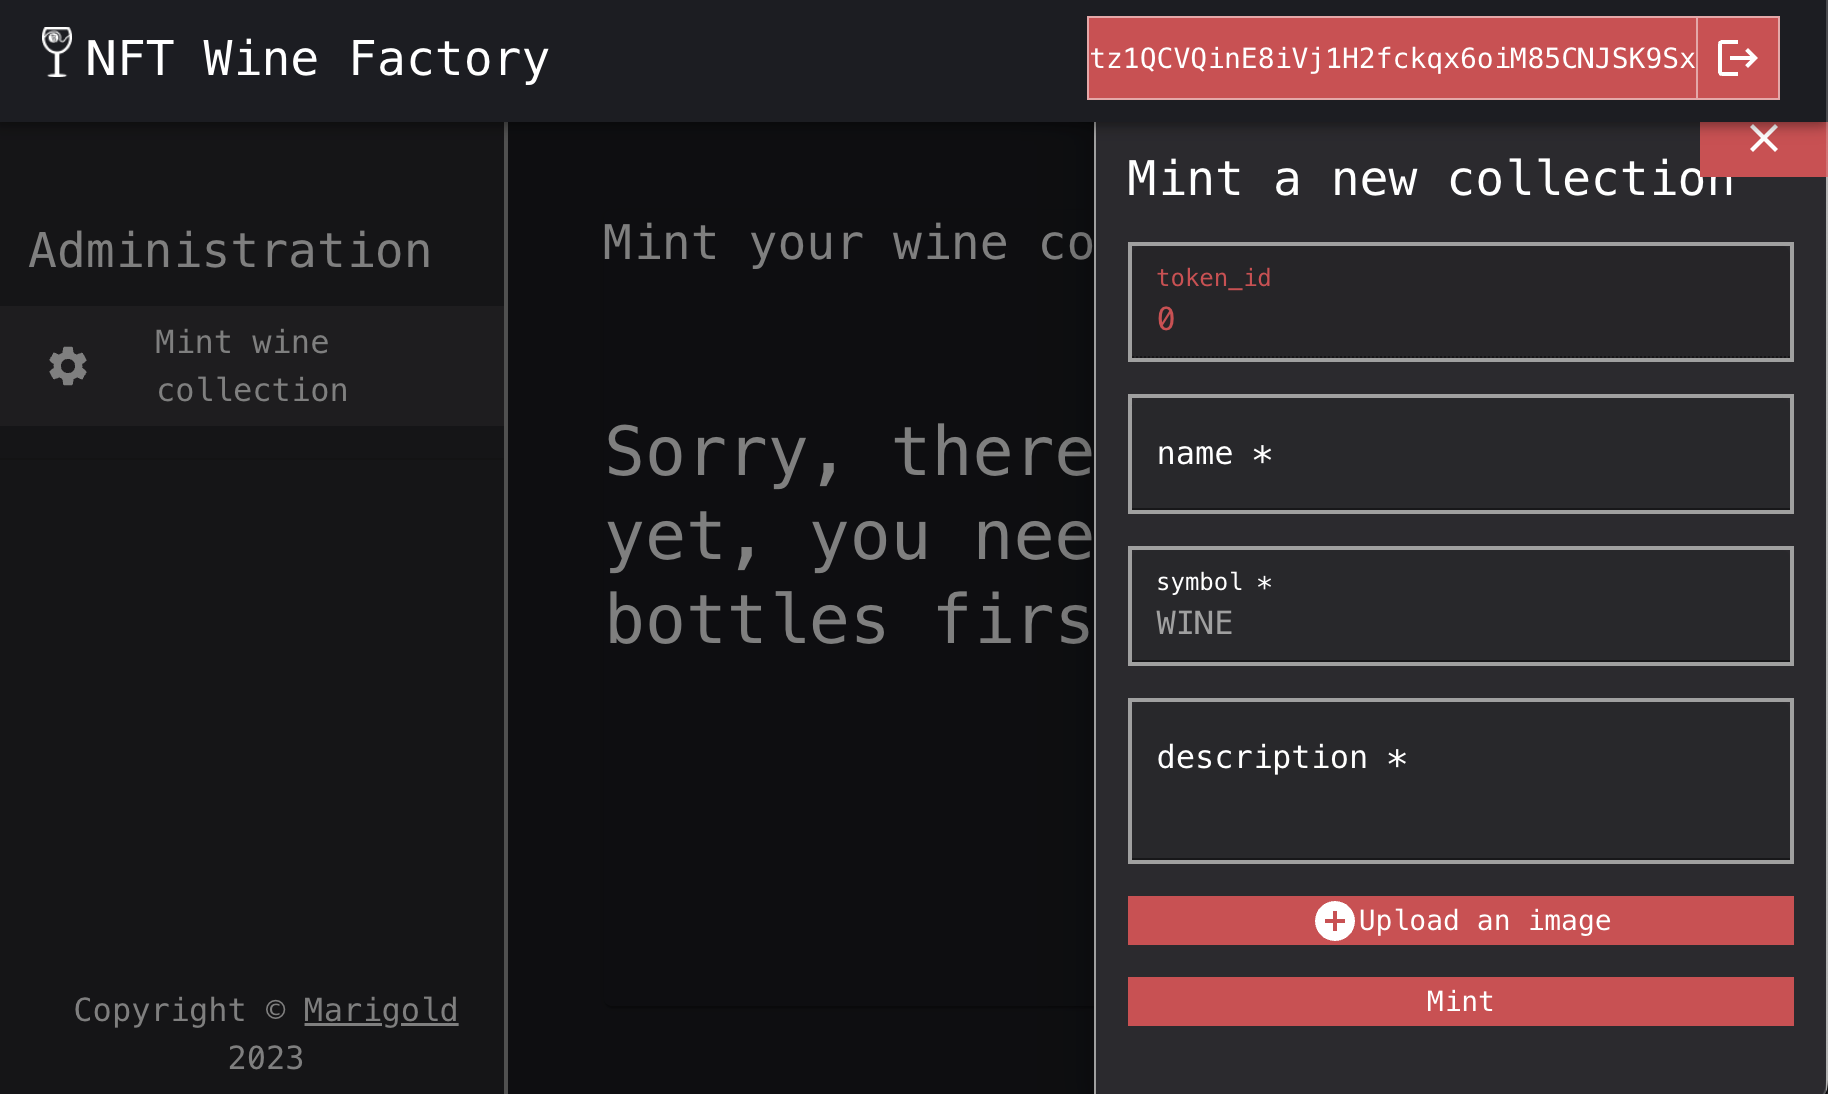
The app goes to the
/mintpage, which looks like this:
-
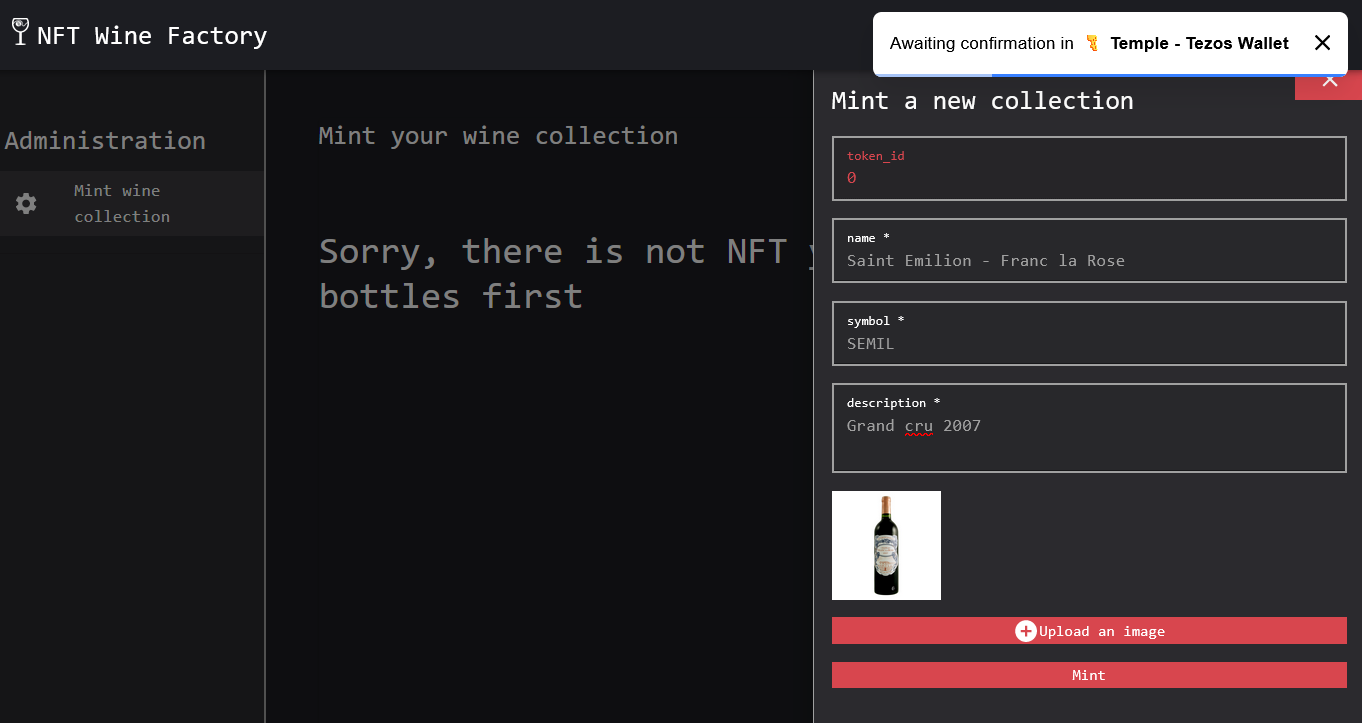
Enter information about a bottle of wine.
For example, you can use this information:
name: Saint Emilion - Franc la Rosesymbol: SEMILdescription: Grand cru 2007
-
Upload a picture to represent a bottle of wine.
-
Click Mint.
-
Approve the transaction in your wallet and wait for it to complete.

When the NFT has been minted, the application updates the UI but it does not have code to show the NFTs yet.
You can see the NFT by getting the contract address, which starts with KT1, from the config.local.testing.json file and looking it up in a block explorer.
For example, this is how https://ghostnet.tzkt.io/ shows the tokens in the contract, on the "Tokens" tab. Because the contract is FA2-compatible, the block explorer automatically shows information about the tokens:

Now the application can mint NFTs. In the next section, you display the NFTs on a catalog page.
Displaying tokens
Follow these steps to show the tokens that you have minted:
-
In the
MintPage.tsxfile, replace the"//TODO"comment with this code:<Box sx={{ width: '70vw' }}>
<SwipeableViews
axis="x"
index={activeStep}
onChangeIndex={handleStepChange}
enableMouseEvents
>
{Array.from(nftContratTokenMetadataMap!.entries()).map(
([token_id, token]) => (
<Card
sx={{
display: 'block',
maxWidth: '80vw',
overflow: 'hidden',
}}
key={token_id.toString()}
>
<CardHeader
titleTypographyProps={
isTablet ? { fontSize: '1.5em' } : { fontSize: '1em' }
}
title={token.name}
/>
<CardMedia
sx={
isTablet
? {
width: 'auto',
marginLeft: '33%',
maxHeight: '50vh',
}
: { width: '100%', maxHeight: '40vh' }
}
component="img"
image={token.thumbnailUri?.replace(
'ipfs://',
'https://gateway.pinata.cloud/ipfs/'
)}
/>
<CardContent>
<Box>
<Typography>{'ID : ' + token_id}</Typography>
<Typography>{'Symbol : ' + token.symbol}</Typography>
<Typography>{'Description : ' + token.description}</Typography>
</Box>
</CardContent>
</Card>
)
)}
</SwipeableViews>
<MobileStepper
variant="text"
steps={Array.from(nftContratTokenMetadataMap!.entries()).length}
position="static"
activeStep={activeStep}
nextButton={
<Button
size="small"
onClick={handleNext}
disabled={
activeStep ===
Array.from(nftContratTokenMetadataMap!.entries()).length - 1
}
>
Next
<KeyboardArrowRight />
</Button>
}
backButton={
<Button size="small" onClick={handleBack} disabled={activeStep === 0}>
<KeyboardArrowLeft />
Back
</Button>
}
/>
</Box>This code gets data from the contract storage and shows it on the UI.
-
Add these constants in the
MintPagefunction:const [activeStep, setActiveStep] = React.useState(0);
const handleNext = () => {
setActiveStep((prevActiveStep) => prevActiveStep + 1);
};
const handleBack = () => {
setActiveStep((prevActiveStep) => prevActiveStep - 1);
};
const handleStepChange = (step: number) => {
setActiveStep(step);
}; -
Replace the imports at the top of the file with these imports:
import SwipeableViews from 'react-swipeable-views';
import OpenWithIcon from '@mui/icons-material/OpenWith';
import {
  Box,
  Button,
  CardHeader,
  CardMedia,
  MobileStepper,
  Stack,
  SwipeableDrawer,
  TextField,
  Toolbar,
  useMediaQuery,
} from '@mui/material';
import Card from '@mui/material/Card';
import CardContent from '@mui/material/CardContent';
import {
  AddCircleOutlined,
  Close,
  KeyboardArrowLeft,
  KeyboardArrowRight,
} from '@mui/icons-material';
import Paper from '@mui/material/Paper';
import Typography from '@mui/material/Typography';
import { useFormik } from 'formik';
import React, { useEffect, useState } from 'react';
import * as yup from 'yup';
import { TZIP21TokenMetadata, UserContext, UserContextType } from './App';
import { useSnackbar } from 'notistack';
import { BigNumber } from 'bignumber.js';
import { address, bytes, nat } from './type-aliases';
import { char2Bytes } from '@taquito/utils';
import { TransactionInvalidBeaconError } from './TransactionInvalidBeaconError'; -
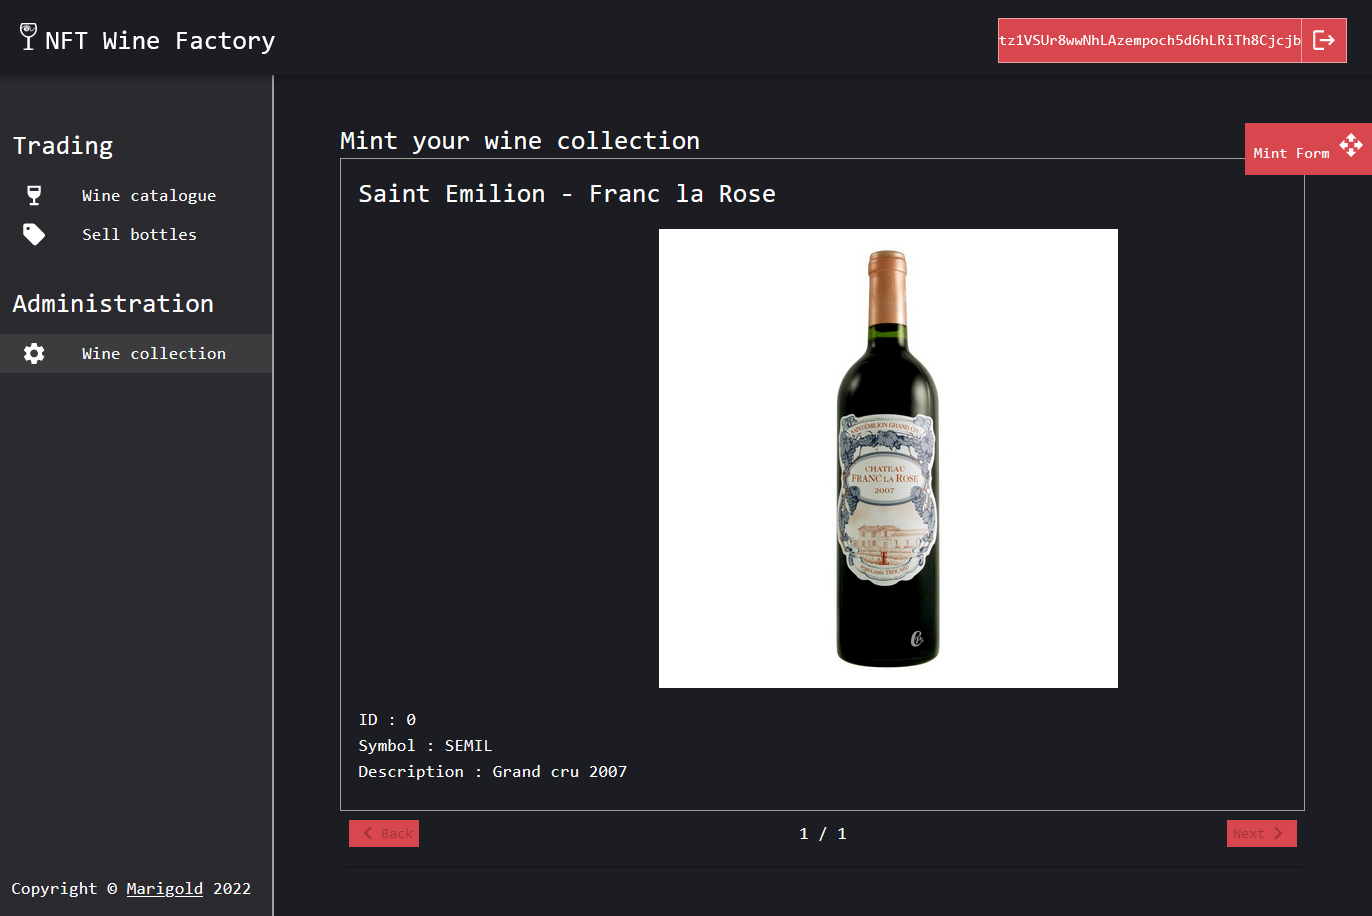
Open the web page in the browser again and see that the NFT you created is shown, as in this picture:

Summary
Now you can create FA2-compatible NFTs with the @ligo/fa library and show them on a web page.
In the next section, you add the buy and sell functions to smart contract and update the frontend application to allow these actions.
When you are ready, continue to Part 2: Buying and selling tokens.